Recently I’ve started to mix things up with my make up routine and use some old products which I discovered looking a little helpless at the back of my make up drawer along with some shiny new additions to the make up collection. I have found myself subconsciously recreating this look a lot over the last month and thought I would give a step by step guide to how I use the products, the brushes I love the most and some favourite items of mine. So here it is….

Step one… conceal any imperfections. I always like to start off my make up routine by covering over the bad bits! As I use to suffer with acne I have scarring and the odd spot to deal with. Rimmel’s Lasting Finish Concealer ‘Ivory 10’ is a new favourite for me, it’s a creamy consistency but covers amazingly! I dot this on with my finger as it tends to warm the product nicely and then I use the Zoeva Concealer and Buffer Brush just to blend it into the areas it’s needed.
Step Two… Foundation. I’ve pulled out an old favourite which is the Mac Pro Longwear Foundation. I use the shade NC20 and find this is a perfect match as I have a yellow undertone to my skin it never looks like I’ve been tangoed, not a great look! On me personally I find it more of a medium buildable coverage, it blends effortlessly with any brush I use and actually leaves a slightly dewy look to the sk in. I use the Zoeva Silk-Finish brush which is beautiful!
Step Three…Conceal those under eyes! If you’re anything like me, a bit of a worrier and stress about anything, this will be a crucial step in your make up routine as some days you get really dark heavy bags. My rescue remedy is Rimmel’s Wake Me Up Concealer ‘Ivory 10′. Thinner in consistency to the lasting finish one this gives a brightening effect to the under eyes. I dot this on with the applicator and blend with a fluffy brush.
Step Four…Powder me Matte. I use the Stay Matte Powder from Rimmel in the shade ‘Silky Beige.’ Personally I find this the best powder ever! It gives me a natural finish and paired with the Zoeva Powder Brush I can swirl this on my face to keep my foundation in place all day! I have tried high end powders but never see the difference and at the price of £3.99 you can’t really go wrong.
Steph Five…Define those Brows… To me this step is vital, I have very light eyebrows and without filling them in I tend to look  odd. I feel eyebrows frame your whole face and can be a feature to enhance any make up look. My go to product has to be the Anastasia Dip Brow Pomade in Granite. I find it’s such a diverse product you can go big and bold with precise definition or use less product for a natural brow. My favourite brush to use is the Zoeva Wing Liner brush.
anything else.
Step Six…Eyeshadow Base. This makes the world of difference if you’re wanting to create an  intense eye look. I use Maybelline’s Colour Tattoo 24 Hour in the shade ‘Creamy Beige 98’, this is a ‘leather effect’ which gives it more of a matte finish making it perfect to use underneath powder shadows. I have also used this with another eye shadow from the range On and On Bronze 35 which is a beautiful metallic shade. I simply apply with my finger to the lid and blend out. You can get these long-lasting cream shadows in a wide range of colours too!
Step Seven…Eyeshadow. With the look I have been going back to lately I have used three different shades of eyeshadow, the first is a gorgeous sand pink shimmer shade from Bourjois Little Round Pot  Intense range. I put this all over my lid but concentration on the inner corner using a MAC 235 brush. But you could use any flat brush which has a stiffer feel to it so you can really pack on product.
I then go o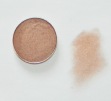 nto fill in the middle of my lid using my Mac palette, first with the shade Sable which is a medium brown colour with red undertones to it creating a warm feel. Then on the outer corners and through the crease I added Antiqued which is the most amazing coppery, rust brown again with red undertones. For this I used the Zoeva Petit Crease Brush. To intensify the look I always use the same colours on my waterline then blend out the colours over all the eye area using a Zoeva Soft Luxe Definer. I love mac eyeshadows as they never crease and are
  extremely pigmented so a little goes a long way!
Step Eight…Lashes. My new favourite is the Benefit’s Roller Lash. I don’t really know what it is about this mascara that has me reaching for it time and time again but I am obsessed! The curved brush really grabs all the lashes and seems to give them lift and definition all at once. I usually go in with a second coat which really intensifies the volume of my lashes!
Step Nine…Contour. My aim is to always contour without looking fake. I have always struggled to find the  perfect powder bronzer which doesn’t have shimmer but isn’t orange toned. Then I stumbled across the Face Contour Kit from Sleek. Perfect! I use this under my cheek bones and around the sides of my face near the temples, blending it out with the Zoeva Luxe Sheer Cheek Brush.
This contour kit also comes with a highlight shade which I use on the high points of my face usually just above the bronzed areas and also the brow bone. If I’m going for a more defined look I might add some down the middle of my nose onto the cupids bow and chin area. It’s a lovely champagne pearl shade that I am in love with at the moment!
Step Ten….Blush. I went back to an old favourite of mine for this step using Sleek’s Rose Gold Blush. I would say if you want to see the full effect of this blush go into a store to try this out! This has a frost like sheen to it and the gold tones it picks up are subtle but when it catches the light gives you a warm glow. I add this to the apples of my cheeks only very slightly using the Zoeva Face Shape Brush. Depending on how intense the highlight is I sometimes miss this step out for a more natural look.
Step Eleven…Lips. For the final touch I like to use a lip liner first as it really does make a difference to the overall look. Mac’s Soar is the perfect colour to match the eyeshadows I used. Then I went over the top with the lipstick shade Mehr which gives a matte finish in a gorgeous pinky nude tone, something which I can’t get enough of lately. I do think that Mac lip products are expensive and I would recommend looking at GOSH for a drug store brand of lip liner which is similar. However as far as lipsticks go I have a serious love for with Mac ones and I definitely want to add more shades to my growing collection!
Here are some different views of the make up look I created…hope you like it!


